LILY'S CREATIVE CORNER #01 ★ THE BUILDING PROCESS - FROM OUTLINES TO FINISHED BUILD (rustic Ponyville house)
Hello everypony my name is Lily Stargazer (Morindil) member of the BT build team and I am here to talk to you about building (what a surprise for a builder),
or more specifically on how to build or even more specifically about the building process from an idea to a finished fully detailed build.
I've been asked to do block-by-block tutorials for builds many times but there are already tons of tutorials like that out there and in my opinion you don't really learn that much from them. So what I want to do instead is to teach you how to plan out and execute your own ideas and follow your creativity instead of simply copying something. We will do this by planing and building a rustic townhouse in a Ponyville-ish style.
STEP ZERO - INSPIRATION/RESEARCH
First of all we need to have an idea what we want to build.
Well that's easy enough as we already decided we want a nice rustic townhouse in a Ponyville-esque esthetic.
At this point we get the creative juices flowing by researching the topic and looking up reference images of the show, real life and similar builds done by others.
Once we have done enough gazing at examples of what such a house could look like and have a basic idea of what we want we start with the actual building process (sort of).
STEP ONE - OUTLINES/SHAPES
Ever wandered in any servers' build team world and noticed those weird colourful geometric figures all over the place?
Contrary to what you might think that is not some bad attempt at pixelart or some piece of modern art those are outlines and build markers ^^
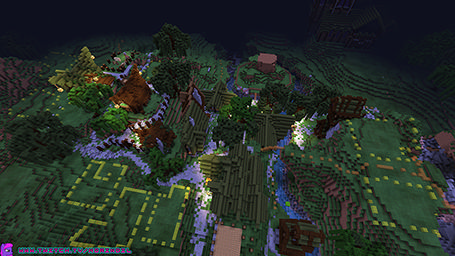
Many builders that are tasked to build sprawling cities, castles, single buildings or anything really tend to plan them out roughly with those markers in an attempt to get a rough idea about scale, layout and position of what they want to build before they even start actually building things.
This is usually done using colourful blocks like concrete or wool with different colours for different things
(eg yellow = house, orange = road, blue = river) or parts of a building (eg red = roof, yellow = foundation, blue = walls)
In our example we will use this to 1. determine the rough shapes of our build and 2. what material/colour we wanne use for different parts of the house.
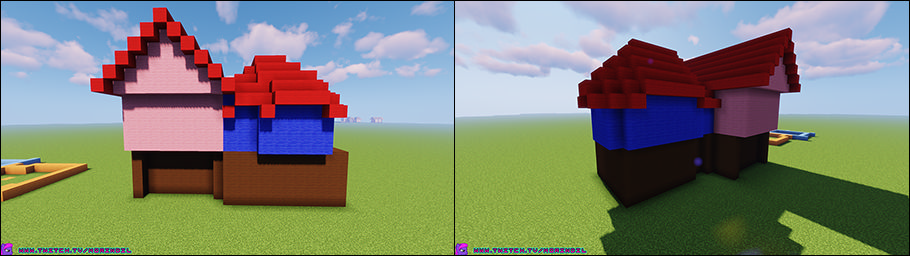
After we determined the rough outline of our build...
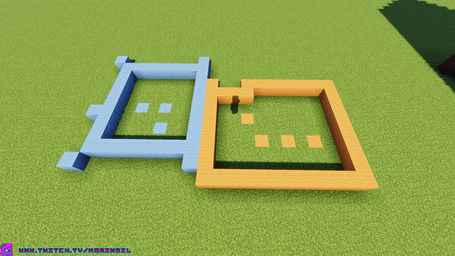
...we start by building the very basic shapes and sections of our house. (brown = foundation/1st floor, pink = 2nd floor #1, blue 2nd floor #2, red = roof)
Note that this is just to get the very basic shapes ironed out as we will add detail and more elaborate shapes later.
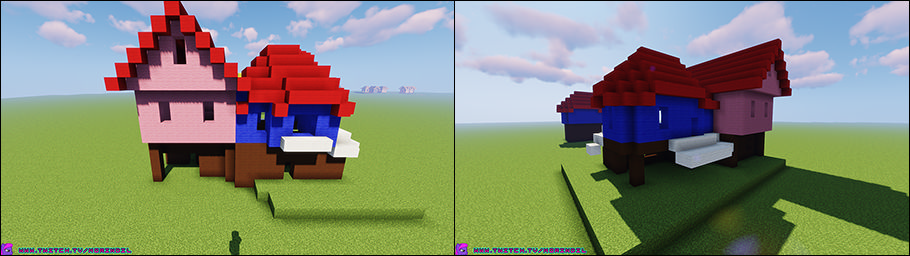
With the basic shapes done its time to expand on it a bit more.
This is when we put in the floors, windows, doors and interior walls to section of large empty rooms into more manageable smaller rooms, on top of that we also start adding additional shape (white = additional detail) in the form of dormas, balconies, chimneys etc)
My advice for windows, doors etc is to do them from the inside out instead of from the outside in as otherwise they might not make a lot of sense when you later furnish the room as they might be in awkward positions.
STEP TWO - TEXTURES/COLOURS
"But lily!" I hear you cry "We have build something that looks like a bad children's drawing and not at all like a nice rustic house!"
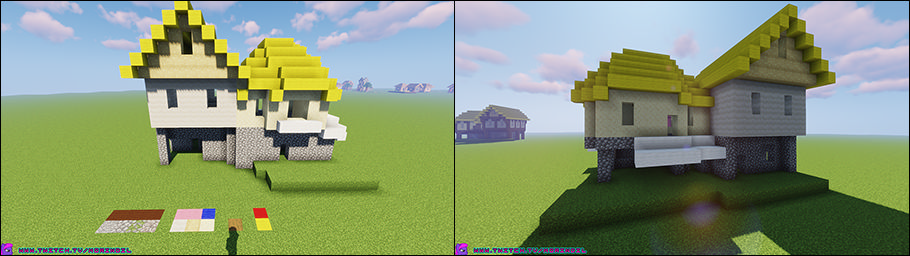
Hold your horsies friends we are far from done ;) Next up we swap all those weird colours for the actual block palette we want.
For our little house i decided to make the foundation/ground floor out of stone, the upper stories out of light blocks and the roof of course out of "hay"
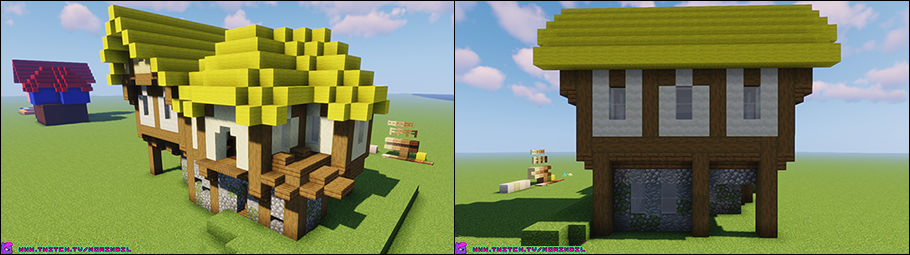
STEP THREE - DETAIL (STAGE 1)
Now that already looks ten times better but not quite right yet. time to diversify the monotony a bit and add the first layer of detail to it.
In our example i chose to break up the monotony of the cobble foundation by mixing it with mossy cobble, andesite and dead coral to give it a more rustic and worn look. For the upper floors i chose to first of all make each section out of a different light block (mushroom stems, smooth sandstone, stripped birch) and then add a framework of darker wood (stripped spruce) to give it that classic rustic tudor style look. Lastly we smoothen the edges with a few colour appropriate (spruce) stairs and slabs and replace those "additional detail markers" with some balconies and overhanging roofs. After we throw in some doors and stained glass windows this step is already done.
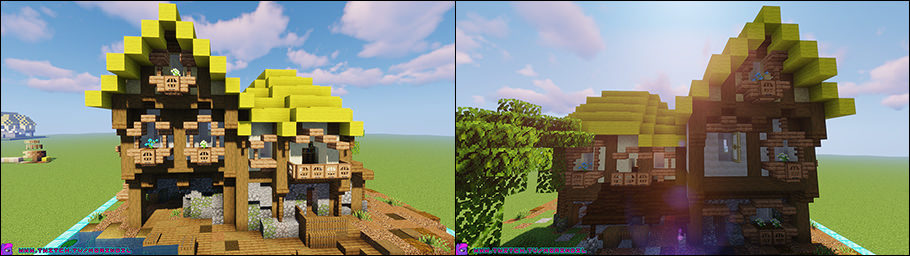
STEP FOUR - DETAIL (STAGE 2)
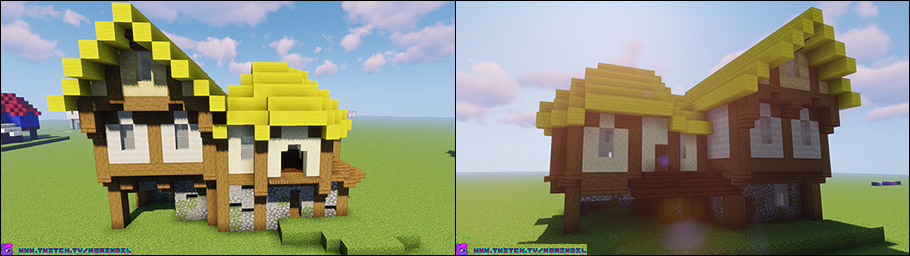
Now our house almost looks like a proper build, almost...
What it is still missing is a second layer of detail that adds stuff like window sills, shutters, balcony rails, flower beds, chimneys (sold separately), little roofs etc...
There is no "rule" for what needs to go where and how much detail is the right amount, some like myself prefer a lot of organic detail and asymmetry, others prefer clean and minimalistic details, in the end it all comes down to personal preference as there is no right and wrong so just do whatever YOU like.
For this build we will simply throw stairs, slabs, fences and trapdoors at the problem until it overflows and gives your super-ocd bff a headache from looking at it ;)
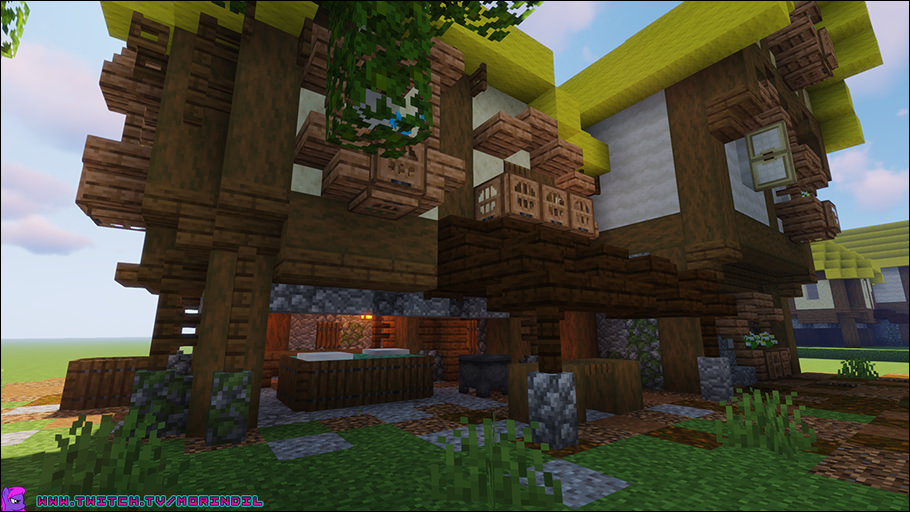 .
.STEP FIVE - SURROUNDINGS / DETAIL (STAGE 3)
There is nothing as sad as a gloriously over-detailed and gorgeous build in a barren landscape.
To remedy this, some extensive purdifying of the surrounding area is in order.
This is even less structured and governed by "rules" than the above step and even more a matter of personal taste so i wont even attempt to explain it.
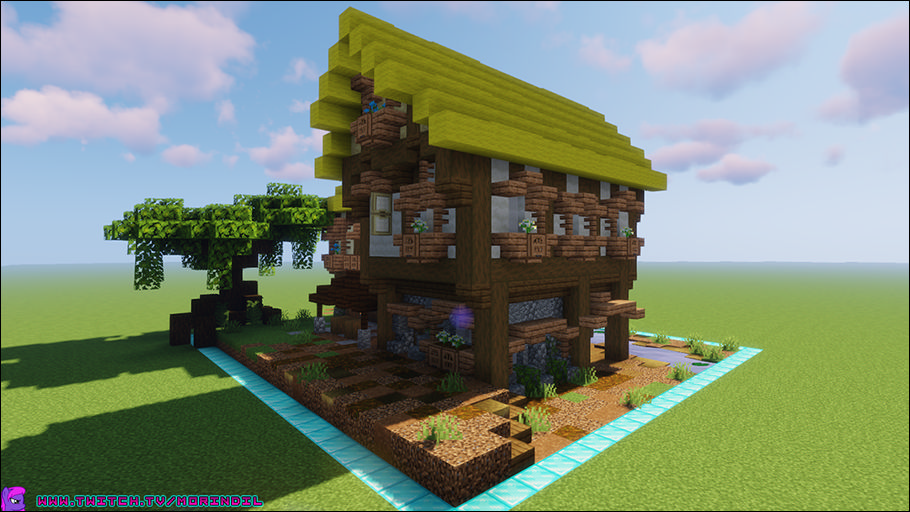
its a topic that deserves a tutorial of its own... suffice it to say we added some water features, made the ground (coarse dirt, brown concrete powder, podzol, path and stripped spruce) look worn and befitting of a rustic village setting and added some greenery in the form of grass and trees.
ADDENDUM/AFTERWORD
And that already concludes this little "tutorial". I hope you found it informative and helpful.
Before you ask about interiors: like landscaping that is a huge topic on its own and cant be easily squeezed into a paragraph and a handful of images...
PS: This was my first attempt of doing a tutorial in a blog formal style and i would appreciate some feedback on how you liked it and if you would enjoy more of these in the future (Discord: Morindil#5078).
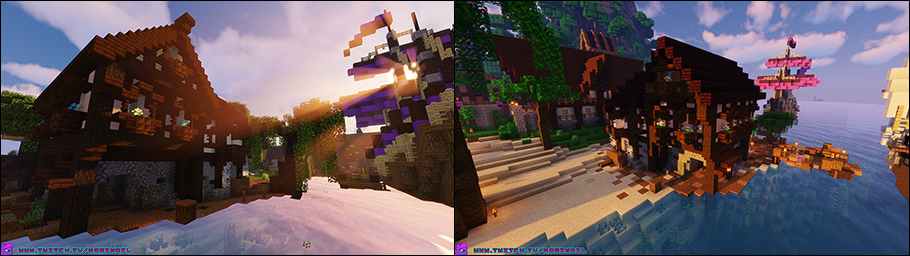
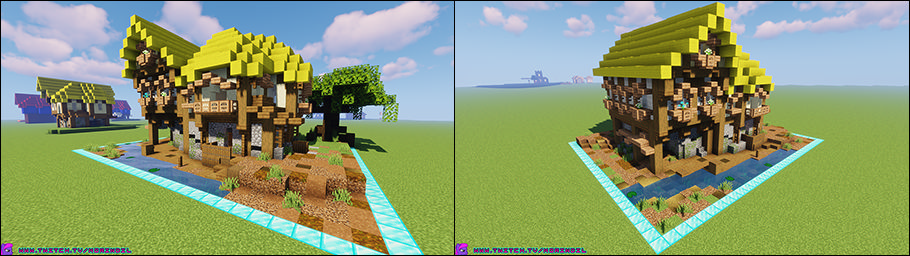
As a little extra to showcase how much of a difference a few variations in choices of block palette can make: the same build in a slightly different palette and setting as a fishing house by the sea.